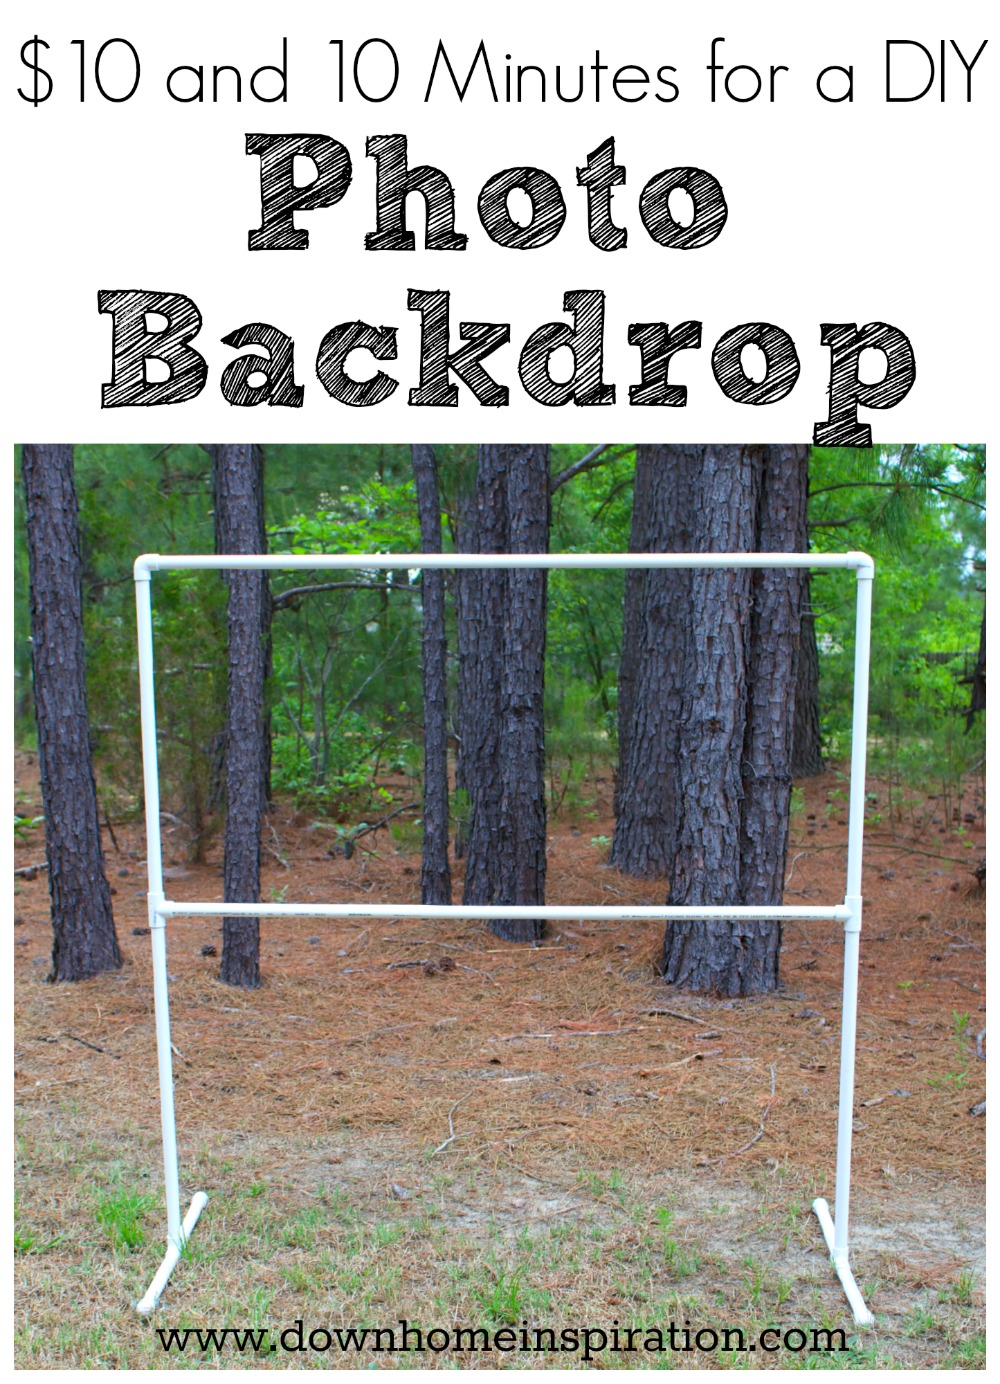
I take a ton of pictures! Not only for the blog, but also of my kiddos and things around my home. It can be very tiring trying to find new places and backgrounds for photos, and sometimes I need a quick change without going far. I had seen so many tutorials for DIY backdrops out there in the vast unknown that is the internet, but had been too busy lazy to attempt one. I officially threw my hands up in the air and called it quits after my last makeshift backdrop fell down on my daughter’s head. I made a quick trip to the store and had this portable, easily storable photo backdrop made ten minutes after I got home.
Supplies Needed
(2) 10′ lengths of 3/4″ PVC
(1) 5′ length of 3/4″ PVC
(4) 3/4″ PVC end caps
(4) 3/4″ PVC T Pieces
(2) 3/4″ PVC Elbow Pieces
*It is very important that you get the “slip” end caps, T pieces and elbows. If you get the “threaded” version it will not slide onto the PVC pipe.
Cut List
2 pieces cut at 54 inches long (cut from one 10′ pipe)
4 pieces cut at 30 inches long (cut from second 10′ pipe)
4 pieces cut at 12 inches long (cut from 5′ pipe)
Here are my pieces in the process of cutting:
I used my handy dandy miter saw, but you could also use a pipe cutter. Cutting was spectacularly easy with the miter saw and extremely quick as well. Once all your pieces are cut it is time to start assembling. Start by attaching one 12″ piece to a T piece and adding another 12″ piece to the opposite end. Put an end cap on each end and repeat. These are the legs to the stand.
Now connect a 30″ piece to the stand leg and add another T piece. Attach one more 30″ piece and repeat for the other stand leg.
Using the two T pieces in the center, connect one of the 54″ pieces to each side of the stand legs. You now have a “double limbo” game according to my kids. They were perfectly content to stop right here.
Lastly, add the final 54″ piece to the top by using the 2 elbow pieces on the tops of the 30″ pipes. This is now the perfect width for using twin size sheets as backgrounds. I was able to drape mine over the top and not worry about it falling off, but I know that I will want the option to use fabric in the future to create new backdrops. I found some “jumbo plastic clothespins” at my local dollar store that clamp onto the pipe beautifully and will work wonderfully to hold fabric up.
I’ve got so any ideas of how I want to use this, but we were just able to take a couple of quick shots before our summer afternoon rain shower rained on our parade. My son was having a blast though!
To store the photo backdrop, simply take your pipes apart and it will take up virtually no space. I can’t wait to take this to our school when we have our fall festival as they do a photo booth each year. You can create this in a smaller or larger size to fit your needs, but this size is just right for kids. So go on, take lots of fun pictures and get creative with your backgrounds!


HI this is definitely a great way to fix that Blogger need for trying to get creative with your backgrounds. It also seems like even a DIY amateur like me could handle it! Thanks so much for sharing…
Tiffany recently posted…Coffee Love, On A Whole New Level
Thanks so much Tiffany! It is totally easy, and yes, even an “amateur” could to it. Haha!
How would I make a backdrop to this. My sons first birthday is coming up and this is adorable???
Twin size sheets are a great option as is fabric. Wrapping paper could also be used, just drape it over the top and tape the seams together.
My hubbie made me one of these stands yesterday, and we used your exact directions- but I’m pretty disappointed with how flimsy it is… it seems like 3/4 ” pipe is too thin…it wobbles with nothing on it- I can’t imagine how it will hold up when I try hang fabric from it. : (
Any suggestions???
I am so sorry to hear that Beth. I threw a sheet on mine and also some fabric and did not have that issue. Maybe make sure that all of your fittings are securely pushed together? Do you have the middle bar? That is there purely for support.
yes and yes! 🙂 we even glued one side of each connecter to see if that would help… oh well,
nice of you to reply!
beth
Oh no, I really hate to hear that, Beth! I am stumped!
omg…I tried using it on Saturday and it was comical…every part of it fell apart, my client and I taped it and propped it and taped by broom to it— don’t know what the prob is? Are you sure it’s 3/4 of an inch pvc that you used? : )
Oh wow, that does sound comical, but I hate that it happened! I verified that mine is 3/4″ pvc this morning. I had actually just used it yesterday with a blanket draped over it for my kids to put on a puppet show. I really, truly have no idea why mine is holding strong and yours most certainly isn’t. I am so sorry that it didn’t work for you!
it’s all good…. glad yours works!
Make sure you use the thicker wall pipe (schedule 40) the thin wall isnt good for anything, including irrigation pipes.
You used the wrong pipe
Same 3/4″ pipe can have different thickness of plastic itself. Difference in pricing.
Would this backdrop be large/tall enough for a photo booth? I’m hosting a baby shower this weekend, and I think this is a great idea! I’m just not sure if it’ll be adult sized or not?
I would make it taller if you plan to use it for adults. Just keep in mind that if you build taller, you should also build wider.
Is there any way that you could help me out with the dimesions on how to make this adult size, bc I plan on putting a photo frame around it as well!! THAANKS AND HELPPPP!! lol
Just bought all the supplies at Home Depot tonight, cost was 13. So glad the Home Depot worker helped me, I assumed the pipe above the sign was that particular size, it is actually the pipe below the sign. My Home Depot did not carry 5 feet sections so I had to buy 3 ten feet pieces. Thanks for the idea.
Hi!!! Just made this in about 20 minutes and can’t wait to use it!!! I have a newborn granddaughter and we are going to experiment with some amateur photography!!! Thanks so much for this DIY project!!!
That’s great, Sharlet! I hope that you get great photos of your sweet baby granddaughter!
hi! I’m sorry but how many feet wide or long is this when its finished?
Thank you so much!!! This was a great tutorial, I followed it to the “T”. But, because I was left with a whole 5′ extra of the PVC piping I had the attendant at Home Depot cut that piece into 4 equal parts and added an extra foot to the height of my backdrop frame(for the taller folks in know). ;o)
Thanks again this was awesome!
Hey Debbie,
I also have alot left over because they didn’t have any 5′ only 10′. Adding that foot, is it too flimsy?
Thanks,
Steph
Hey There,
Thank you for this great DIY!!! I love it, paid $11 at home depot. My question is to use this for adults would it be ok to add another 15″-20″ up without it being to flimsy? I read your comment about making it wider but that means purchasing everything over lol. It’s only for 1 day so I’m hoping I can get away with it.
Thanks,
Steph
I made my stand a couple of years ago, and to make it more sturdy I used 2″ pvc pipe for the feet with a 3/4″ reducer tee for the legs to fit into. I filled the feet with sand for weight. when taking apart just use pvc endcaps to cap off the feet at the 3/4″ tee.
Hello, How tall is this photo booth?
just wondering where did you go to buy the pvc pipes?
You can find them at any home improvement store.
does anyone know what the final dimensions are?
Hi Kristen! I’m thinking about using something like this for my wedding backdrop. I know I would have to change the dimensions a bit. How do you attach fabric? Do you simply drape it over the top or do you do some sewing? Thanks!
Hi Lindsay, I just draped the fabric over mine…the less sewing the better where I’m concerned. Haha!
Thanks so much for the easy step by step instructions! Made this for Homecoming backdrop as something extra and fun! Decorated with bling ribbon over top, & silk flowers. Kids loved it!
So fun!!!
can anyone tell me where to buy this?
Looks like a really easy way to create a photobooth! It could be used in so many situations too! Thanks for sharing.
Brian recently posted…Kids Gone Wild at the Galleria 2016
Worked perfect for me, I got the thicker 3/4″ pvc and it was easy to cut, put together and stands perfectly. I paid a little more but the thicker pvc was more expensive but not by much. It only cost me $15.00 thanks for the tutorial 🙂
To make this adult size do you double all of the measurements ?
would love to some pics of everyone’s end results with the fabric…!! I used one of those clothes hangers that look like that from walmart….my husband then made me extensions so I go go 6 or 8ft across….!! FYI..i ordered from dresslily a shower curtain that looks like a barn door…i’ll post a pic once it gets here…thanks for inspiring me!!! darlene
Wow, so helpful! I’m transforming one of my unused guest rooms into my office/studio and this is just what I needed for the “photography corner”. I’ll definitely give you a shout-out in my post where I make my own backdrop stand! Thanks so much for sharing!
What a fun use for a guest room! Hope you love it!
Can someone post the final dimensions for an adult stand?
How tall is this backdrop?
Hi, does this disassemble easily? I’ll need to transport the frame. Thank you.
Hi Jessica, it is super easy to disassemble! Just take the pipes apart and you are good to go!
Your approach seems simple but interesting
I saw one made of 1 1/2 PVC for a puppet show and it worked great. Not for $10 though
What are the deminsions of this backdrop?? My students are creating this for a theater backdrop & we are trying to figure out exact deminsions
Thank you!
Hi Jordan, I have the backdrop taken apart in my attic right now while it is not in use, but it would be just over 60″ tall by 55″ wide. Hope this helps and that your students love it!
Following these excellent instructions it stands at 64 inches. For an adult size one. You could get 2 48″ pieces cut and substitute that for 2 of the 30″ pipes. That would take it to about 82″, a little bit higher than a standard doorway.