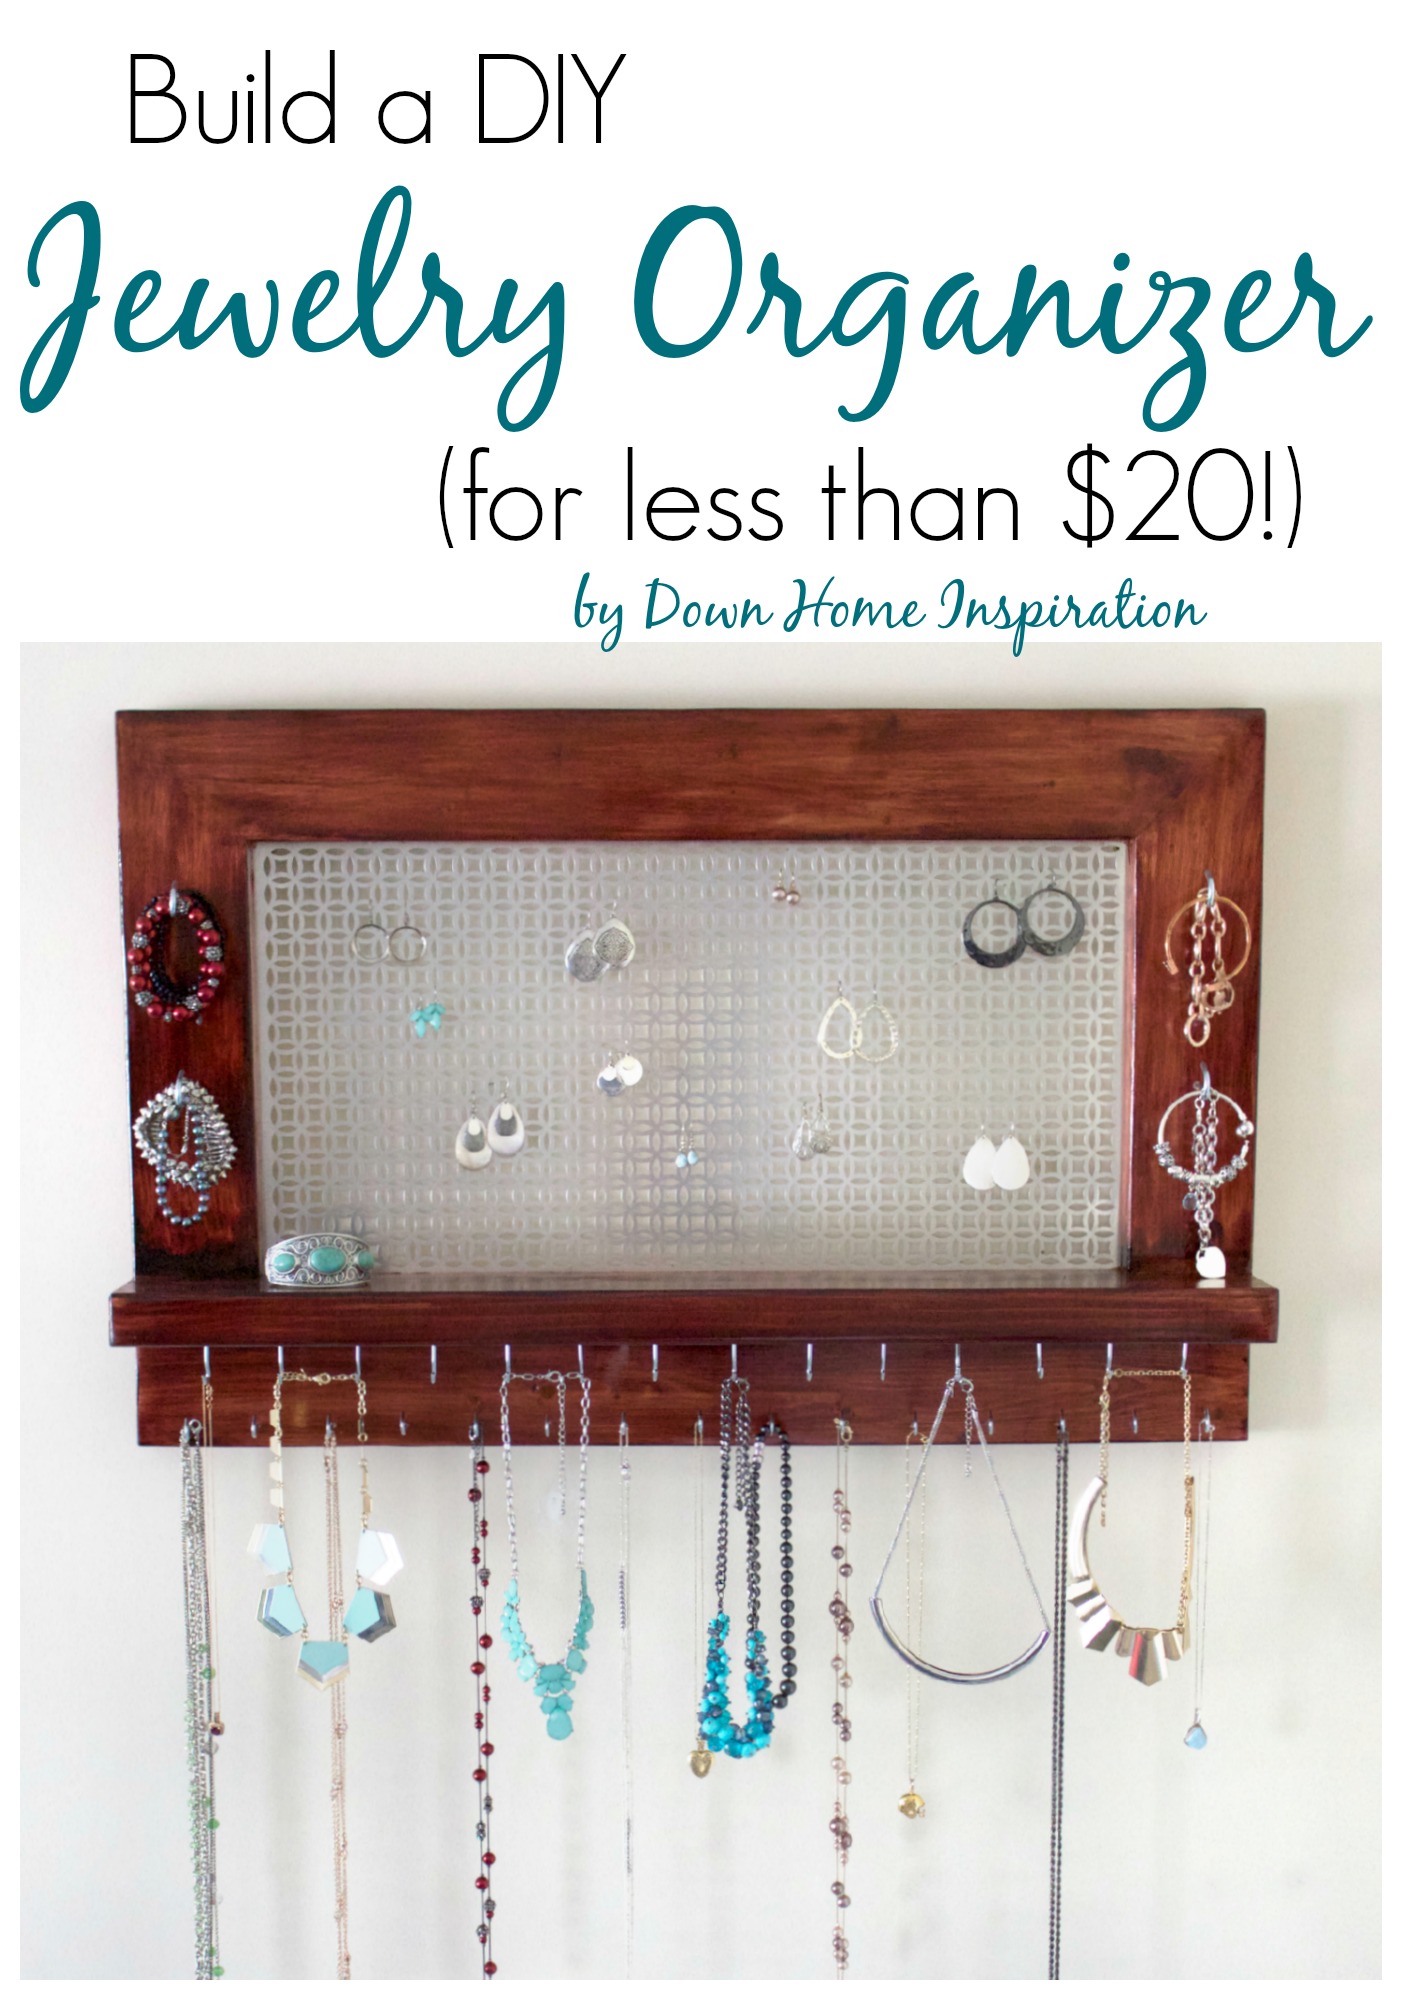
I’ve been slowly but surely building up my stock of statement jewelry pieces lately. Although I used to be a bit shy and uncomfortable wearing “look at me” jewelry, I really love it now and am enjoying collecting lots of fun pieces. However, my small jewelry box that held my pearls and a pair of diamond studs was in no way large enough to house all of my cute statement necklaces and earrings. But lucky for me a quick stroll down the aisles of Hobby Lobby inspired an easy to build, beautiful DIY Jewelry Organizer that I made for less than $20! And I’ve got the plans below, so you can make your own too!
Supplies
(1) 8 ft 2′ x 6′ (you will only need 32″)
(1) 8 ft 2′ x 4′
(1) 1′ x 2′ decorative metal piece (I found mine at Hobby Lobby and it was just over $7 with my 40% off coupon)
miter saw
drill and bits
2″ screws
sandpaper
wood glue
hooks (your choice of size and amount)
finishing products (stain, paint, wood putty)
table saw (optional)
Assuming that you are using a metal piece that is cut to 1′ x 2′ (which was the original size of the decorative pieces sold at Hobby Lobby), the measurements are as follows. If you are using a metal piece of another size, you can use these plans as a jumping off point and measure what you will need your cuts to be.
Cut List
(1) 2’x 6′ @ 30 3/4″
(1) 2′ x 4′ @ 30 3/4″
(2) 2′ x 4′ @ 15 1/8″ (One edge needs to be square at 90*, but the opposite end needs to be at a 45* angle. Measure from the square edge to the long edge of the angle.)
(1) 2′ x 4′ @ 30 3/4″ (Both ends need to be at a 45* angle. Be sure to measure from long point to long point.)
You’ve heard me say this before, but there are two ways to do this, the easy way and the hard way. Because I knew that I wanted to keep this jewelry organizer for a long time and I want it to be functional and easy to use I chose the hard way. I will tell you how to do it the easy way as well, and it would work just fine and dandy, you just might need to get creative when it comes to hanging it. The challenge is the metal piece that is being used to hold earrings. If you attach it flush to the back of the frame it will sit right up against the wall that it is hung on, making it much more challenging to hang earrings from it. I chose to remedy this issue with my trusty old table saw, cutting a channel for the metal piece to sit in 3/8″ from the back, giving enough space to hang earrings with no difficulties. Please note that if you choose to attach the metal directly to the back, make all cuts 1/4″ shorter so that you have enough metal overhanging to attach it to your frame. This is important!
Dry fit your boards quickly to ensure that you’ve got a nice fit and that all boards meet up nicely at the angles.
To make channels with a table saw, set the table saw at 3/16″ deep with guide at 3/8″. Cut a 3/16″ channel along all of the frame boards (all boards except the square to square 2′ x 4′ @ 30 3/4″), cutting it 3/8″ from the back of each board.
At this point, you should dry fit all of your boards together once again to ensure a good fit, this time putting the metal in place. If the metal is still too large, cut your channels a bit deeper. You’ve got a frame that the metal piece should be able to slide into (or you can attach the metal to the back if you prefer), and a shelf that is perfect for a ring holder or large accessories that you don’t want to hang.
Sand all boards and stain or paint. Trust me, as someone who may or may not know from experience, I bet this would be so much easier to do at this point than when it is all assembled. Just sayin’! Who knows, it may be a pain to keep the stain off of the metal?
(I love getting my kids out in the garage to help me build!)
Once your stain and / or paint is dry, it’s time to assemble! Using wood glue and 2″ screws (please make sure to drill pilot holes!), attach pieces in the following order:
vertical 2′ x 4’s onto the 2′ x 6′ shelf, screw from the bottom of the shelf
bottom 2′ x 4′ onto shelf, screw from top back corner of shelf at slight inward angles
slide the metal into the slot
and then the top 2′ x 4′ onto the vertical boards, screw from the top as this shouldn’t be visible when hung
Because the saw blade on a table saw is 1/8″ thick, the metal may have a bit of wiggle room. The easiest way that I could come up with after much deliberation (and a phone call to my sweet husband), was to add small pieces of wood to the back of the channel, behind the metal piece. This will wedge the metal forward and keep it tight. Wooden match sticks without the tops would be perfect. If you don’t mind the small amount of wiggle, go ahead and leave it, but I knew that it would push this OCD girl over the edge.
Now that all the pieces are attached, you may need to putty the corners if it is not a tight fit. If you do, sand and restain after the putty has dried.
Seal the organizer with a couple coats of polyurethane.
Before adding the hooks, set them onto the organizer to see exactly where you want to put them. It’s always easier to do a dry run than to try to cover holes if you place the hooks and decide you don’t like the positions. I used two rulers so that I could ensure I was keeping a straight line and equal distance and drilled pilot holes in each spot that I wanted to place a hook. After spending your time and effort, please make sure to not skip this step. The pilot holes will help keep the wood from splitting and will really make it easier when you are screwing the hooks in as well. Screw hooks into pilot holes by hand.
And after a little bit of elbow grease and some fun build time, you’ll end up with a beautiful DIY jewelry organizer that has tons of space and looks amazing hanging on your wall. And bonus points because every time that you get a compliment on it you get to say, “Thanks, I built that!”
Linked at Practically Functional


Kristen, this is beautiful!! I absolutely love the mix of metal and wood!! I also love that many places to hang earrings. I have already found that with my organizer the eye hooks for earrings filled up way to fast!
I agree Melissa. It’s amazing to me how much space earrings can take up!
This is SO gorgeous! I love that decorative metal panel – so chic!
Erica recently posted…Bloom Printable Quote
Thank you so much, Erica! I am in love with it and I am constantly amazed with the amount of storage that it provides.