The last couple of weeks have found me knock down, drag out sick. We are talking pink eye, an ear infection and a sinus infection all at the same time. Or as a girlfriend put it:
The trifecta of suck.
Yeah, that sums it up pretty well. But while I was wallowing in a nice warm bath one night while trying to clear my sinuses, I realized that I was missing something that could make my life, at that very moment, more enjoyable. What could it possibly be, you say? Enough antibiotics to make a horse unconscious? All the NyQuil in the world so I could get a decent night of sleep? Nope.
Something to hold all my crap while I was in the tub.
I mean, who wants to find space on the side of the tub for a mug of hot tea, a book, my laptop for when I am too lazy to hold my book up anymore and want to watch Hulu, maybe some candies (because that is the best kind of medicine for me!), my phone and whatever else I could possibly think to drag in there with me?
Not this girl.
This girl wants to laze in the tub like there is not a care in the world or three bickering children right outside that bathroom door. This girl needed a DIY bath shelf. And I needed it ASAP!
Luckily, it is ridiculously easy to make and I had all of the supplies laying around in my garage. As soon as my head cleared enough for me to move it without feeling like I was about to pass out I got right to work. And even better timing since I am participating in a 12 Days of Handmade Christmas blogger round up! (Make sure to check out all the great ideas at the end!)
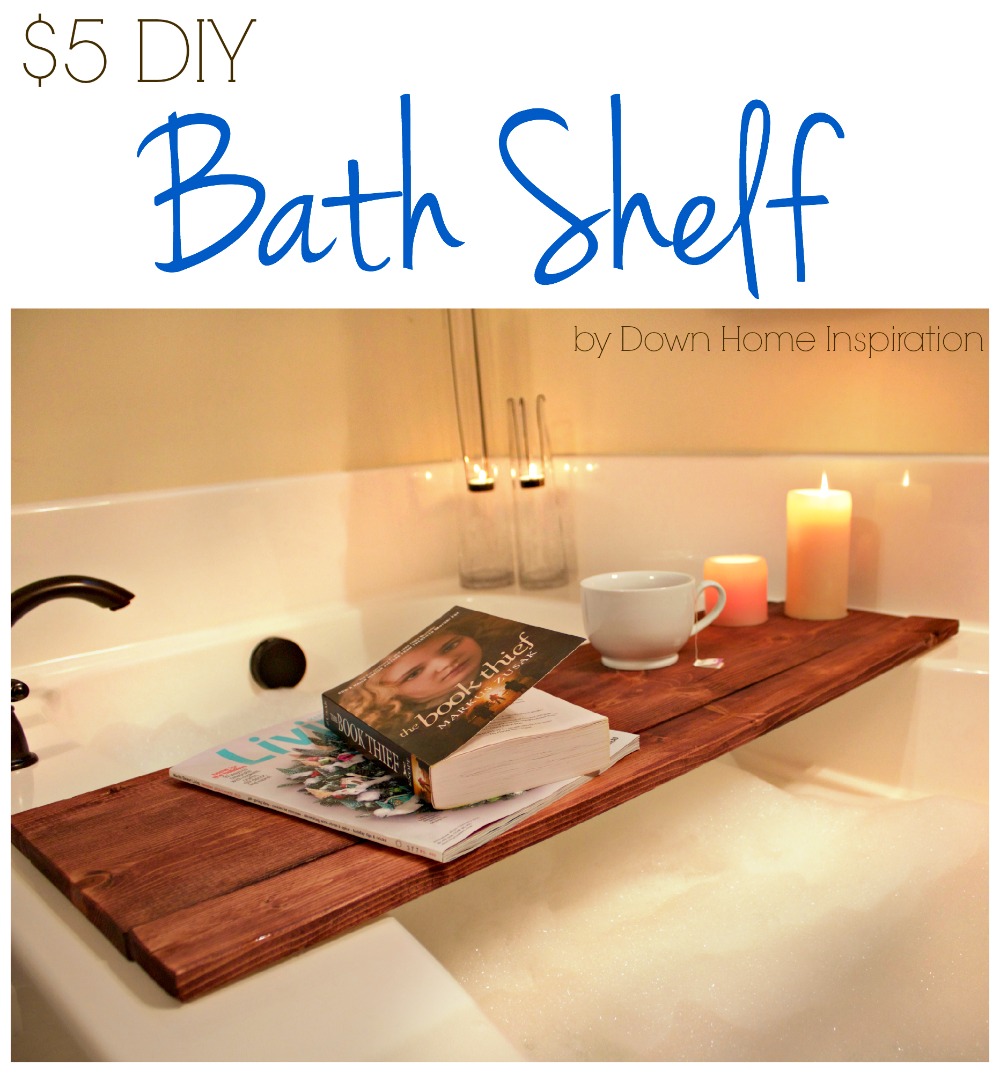
So much about this shelf boils down to personal preference. The boards, for instance…any combination of boards to make a shelf wide enough for your liking would work perfectly. You could use 1x2s all the way up to a 1×12. I chose to use a 1×8 with a 1×3 on either side. That gave me a shelf large enough that I can set my laptop on it without worry. If you are just looking to hold a book, maybe you don’t need such a wide shelf. The length of the boards will also depend upon your needs. I measured mine out to leave a couple of inches on either side so that the shelf wasn’t rubbing against the wall or hanging off the edge (because I would totally run into it and curse myself, I just know it).
With that said, I cut my 1×8 to 36″ and then did the same with (2) 1x3s. I sanded the boards down, placed them together and added some cleats. I used a 1×1 furring strip to make cleats out of. Making sure that they overlapped onto all three boards, I drilled pilot holes (super important with these boards…they will split!) and screwed all my boards together with 1 1/4″ screws.
I used a stain and poly in one, but I plan on adding another coat of polyurethane to the top for added protection against those water drops. I also glued a small piece of felt to the ends on the underside to make sure that I don’t accidentally scratch my tub.
And that’s it! In less than 30 minutes from start to finish I have a beautiful bath shelf. I love that it matches my jewelry organizer that I have hanging nearby. That and the fact that now I can be super duper lazy while I take a soaking bath!
This project was totally free for me since I found all of my supplies in my garage, but this would be an incredibly inexpensive gift to make…we are talking $5-$10 here, people! And how fun would this be to get the kids involved and make a gift for mom or grandma?
Because I am a super nerd and am totally missing my hubs right now I added our initials to my shelf. But this is a great example of how you can personalize it and make it your own.
Make sure to check out all of the great handmade ideas from these awesome bloggers!
December 1 – Rustic Wooden Chalkboards with Living on Love
December 2 – Fabric Candy Cane Ornaments with Crafty Mally
December 3 – Cookie Jar Snow Globes with Tag & Tibby
December 4 – DIY Bath Caddy with Down Home Inspiration
December 5 – “You Are Home” US Ornament with Natalie Creates
December 6 – Fat Quarter Cloth Napkins with That Moxie Girl
December 7 – Painted Decor Blocks with Classic Play
December 8 – Footprint Reindeer Aprons with The Caterpillar Years
December 9 – DIY Hostess Gift with Buzzmills
December 10 – Emoji Onesies with Frock Files
December 11 – Dried Fruit Ornaments & Garland with Maker Mama
December 12 – Salt Dough Frame Ornaments with Small + Friendly


Oh heck yes! I NEED this! I know exactly what my hubby can get me for Christmas! Thanks!
Carla recently posted…Gift Guide: Top Toys for 4-5 Year Olds
brilliant idea!
This is one of those projects I’ve been wanting FOREVER but just never get around to! Silly me, you make it look so easy. Plus I think adding you and your hubby’s initials was super cute… I wanted to see! Love it.
Betsy @ Happily Ever After Etc. recently posted…Glass Spice Bottles