This shop has been compensated by Collective Bias, Inc. and its advertiser. All opinions are mine alone. #SchoolYearReady #CollectiveBias
After nearly a decade as a stay at home mom the time has finally come for my baby to head off to kindergarten. It’s hard to believe how quickly those years have passed and how much we have grown and changed as a family since then, but one thing has remained the same. I am obsessed with those darn kids and want them to be the absolute best that they can be in life. To help my little one succeed this year, I made her some reusable DIY dry erase flash cards that she can practice with. You can make some too with the free printables at the bottom!
The thought occurred to me after watching my children come home with countless tracing worksheets that I would be better off creating something that could be used over and over again. I headed off to Walmart to pick up my supplies (Scotch™ Thermal Laminator, Scotch™ laminating pouches, book rings and fun scrapbook paper) and got straight to work. I found it all in the office supply area.
I chose to use the thermal laminating pouches, but there are some awesome self seal ones as well if you don’t want to purchase the machine.

I started by making up my printable (you can get them for free below) and warming up the laminator. Because I was using textured scrapbook paper I set it to 5mil and waited for the ready light to let me know when to start.
Set the paper into the pouch, with the paper close to or touching the one sealed edge.
Insert the sealed edge of the pouch first into the machine and let it feed itself through (make sure to adjust the tray guides to whatever size pouch you are using).
The paper will exit the laminator on its own when done. Set it aside on a flat surface and allow it to cool.
I cut the excess off of my pouches after they had cooled and then punched holes into them. Book rings were perfect to slide the flash cards onto and be able to flip them easily.
With some dry erase crayons, my little one is ready to go!
I love being able to customize my projects, so I chose to use some adorable paper to show on the backside, but you could definitely do double sided flash cards as well.
How fun are these, though?!
You could just as easily laminate store bought flash cards too!
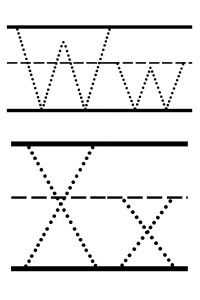
So what do you think? Are you ready to make your own? Just click on the links below to print the entire alphabet, two letters per card, and 1-10. You can also find some more really great and creative ideas here.
To print, click on each image to bring it to a page with only the photo, then select 4×6″ size and print.


This is such a great idea! I love that you’re going above and beyond to help out your “baby” to have a successful year. These turned out so cute, too! ~ client
Nicole Elliott recently posted…An Easy, Satisfying, and Delicious Breakfast for Back to Busy
Hello,
I am really delighted to read this weblog posts which carries tons of helpful information,
thanks for providing these kinds of information.
Thanks